When it comes to styling curly hair, the best routines are often the simplest. It all boils down to this: apply a leave-in conditioner and curl cream to soaking wet hair for a serious moisture boost, then lightly glaze a gel over everything to lock in that beautiful definition and keep frizz at bay. After that, whether you air-dry or diffuse is your call, but that core process is what sets you up for bouncy, long-lasting curls.
Thank you for reading this post, don't forget to subscribe!Embracing Your Curls as the Foundation
The real secret to incredible curly hair isn’t about wrestling your texture into submission. It’s about learning to work with your natural curl pattern. Think of this guide as a way to shift your focus from "controlling" your hair to "defining" it. Success really begins the moment you step into the shower and doesn't end until your hair is 100% dry.
Forget those complicated, 12-step routines you see online. We’re going back to basics with a simple, repeatable framework that builds hydration, encourages your curls to clump together naturally, and locks in your style for days.
Your Roadmap to Defined Curls
This whole journey is about building a solid foundation. So many people get frustrated with their curls because they jump straight to styling products, not realizing that the prep work is what truly makes or breaks the final look.
Let's break it down into a few key stages:
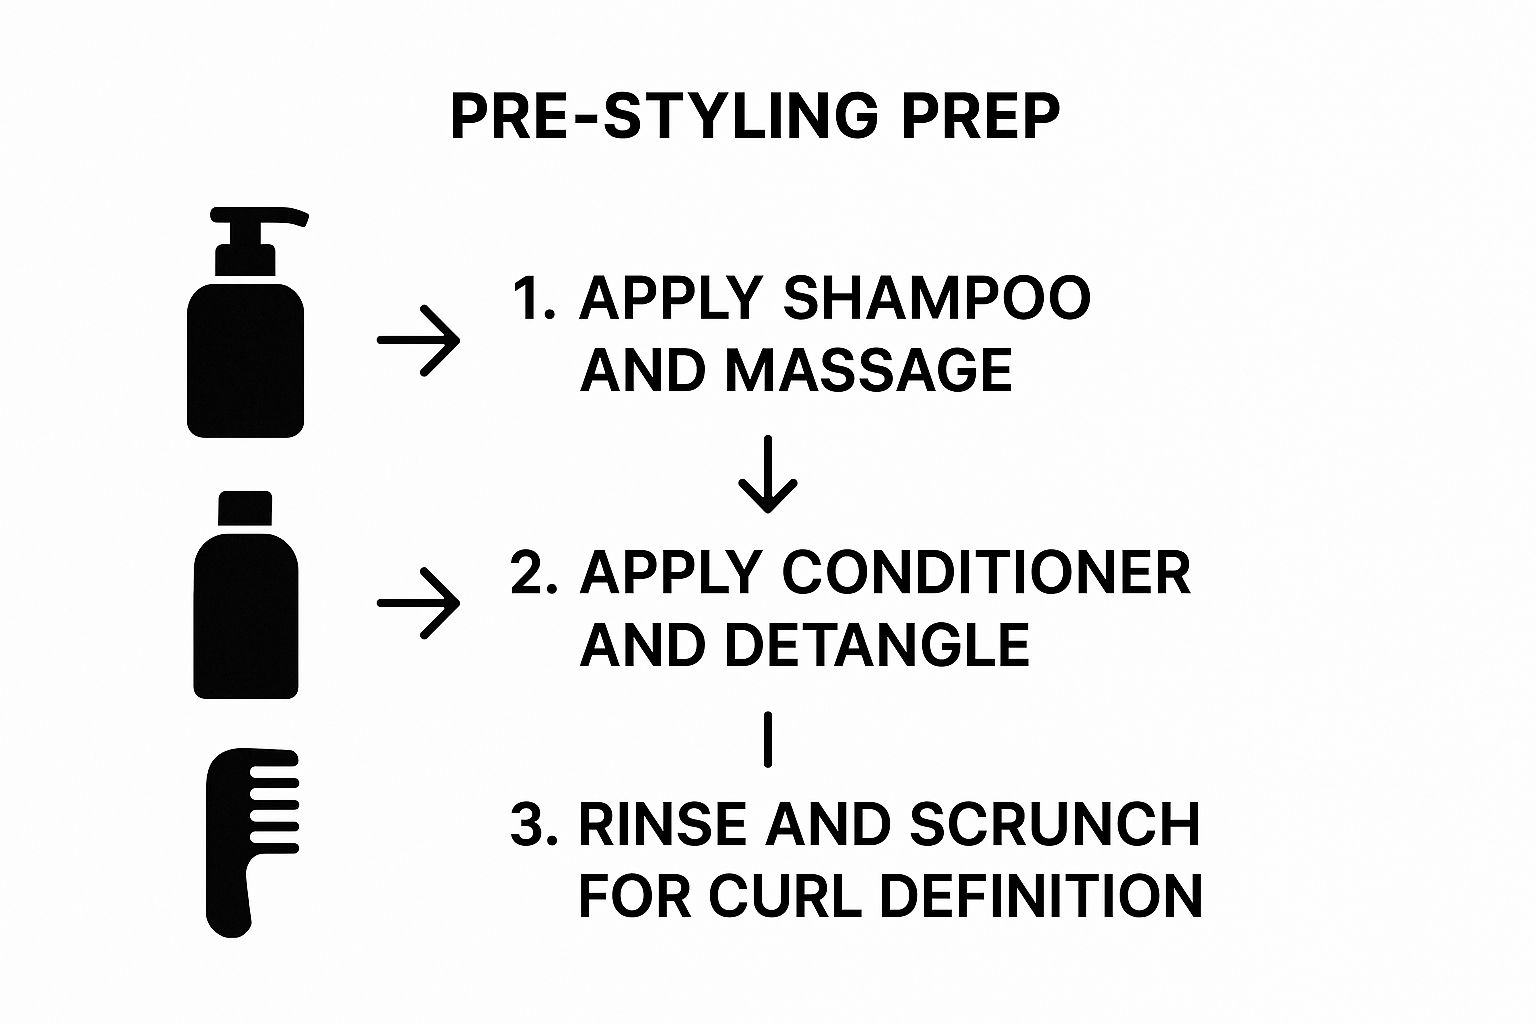
- Preparation: This all happens in the shower. It's where you load your hair up with the moisture it needs to stop frizz before it even starts.
- Application: This is the art of layering products on wet hair to define your curl clumps and give them a lasting hold.
- Drying: How you get the water out is just as important as how you put the product in. Your technique here dictates your final volume and definition.
The most important thing to remember is this: Moisture is your best friend. Every single step, from washing to drying, should be about hydrating your hair and sealing that moisture in. If you don't have a good moisture base, even the most expensive styling products won't perform their best.
Before we dive deep into each step, here's a quick overview of the process. Think of this as your cheat sheet for styling day.
Quick Guide to the Curly Hair Styling Process
| Stage | Objective | Key Action |
|---|---|---|
| Preparation | Maximize hydration | Cleansing and conditioning hair thoroughly in the shower |
| Application | Define curl clumps | Applying stylers (leave-in, cream, gel) to soaking wet hair |
| Drying | Set the style without frizz | Using a diffuser or air-drying to gently remove moisture |
This simple, hydration-focused approach is a celebration of natural texture. It’s no wonder the global curly hair care market is absolutely booming—it's projected to grow from $9.7 billion in 2021 to over $15.6 billion by 2031. This massive growth is being driven by the exact shift we're talking about: people finally embracing their natural hair.
A healthy foundation becomes even more critical when the seasons change. For instance, you’ll want to know how to keep your curls healthy during summer, when the sun and humidity can really do a number on your hair.
Once you have the right foundation, you'll see that your curls aren't a problem to be solved—they're your best feature.
Preparing Your Hair for Lasting Definition
Great styling doesn't start with a jar of cream or a bottle of gel. It begins the second you turn on the shower. This is your chance to build the moisture foundation that will stop frizz in its tracks before it even has a chance to show up. Honestly, learning how to get the most out of your curly hair is realizing that preparation is 90% of the battle.
So many of us were taught to fight frizz after we get out of the shower, but that’s a losing game. The truth is, frizz is just your hair crying out for moisture. If you can focus on deep hydration while you wash, you’re creating a perfectly smooth, happy canvas that’s ready for any styling product you throw at it.
Choosing Your Cleanser Wisely
The very first thing to look at is your shampoo. A lot of traditional shampoos are packed with harsh sulfates—powerful detergents that are great at cleaning but also strip away all the natural oils your hair desperately needs. Since curly hair is already on the drier side, this can be a recipe for disaster, leaving you with a brittle texture and that dreaded frizzy halo.
This is why most people with curls land on one of two alternatives:
- Sulfate-Free Shampoo: Think of this as a gentler approach to cleaning. It gets your scalp and hair clean without stripping away all its natural moisture. This is a fantastic choice if your hair is on the finer side and gets weighed down easily, or if you use a lot of heavy styling products that need a bit more power to wash out.
- Co-Wash: This is short for "conditioner washing." A co-wash is a specially formulated cleansing conditioner that cleans and conditions in one go. If you have very dry, coarse, or tightly coiled hair that needs to hold onto every last drop of moisture, this might just be your holy grail.
Don't be afraid to experiment. You might find your curls love a co-wash most of the time but need a good sulfate-free shampoo once a week. It's all about listening to your hair.
The Art of Conditioning
Once your hair is clean, it's time to load it up with conditioner. And I really do mean load it up. Forget what you know about using a dime-sized amount; curly hair can take a lot more than you think. The goal here isn't just to detangle, it's to infuse every single strand with water and nourishment.
There's a technique I swear by that completely changes the conditioning game: 'squish to condish.'
After you’ve applied a very generous amount of conditioner, don't just rinse it straight out. Instead, cup some water in your hands and gently squish it upwards into your hair, section by section. You should actually hear a "squishing" sound as your hair drinks up the water and conditioner. This simple move encourages the hair cuticle to swell with hydration, which is the secret to getting those juicy, defined curl clumps you're after.
Pro Tip: Your hair should feel incredibly slick and smooth when you're done, almost like seaweed. If it doesn't, you probably need more conditioner or more water. That slippery feeling is your benchmark for perfectly moisturized hair.
The Final and Most Crucial Step
Okay, before you even think about reaching for a towel, there's one last non-negotiable step. Applying a leave-in conditioner. The key here is to apply it to soaking wet hair—I’m talking dripping wet, right there in the shower.
This is all about locking in the water from your wash before it has a chance to evaporate and let frizz sneak in. This is probably the biggest mistake I see people make; applying products to damp or towel-dried hair is too late. The leave-in conditioner acts as your first layer of defense, creating a smooth, hydrated base for your stylers to go on top of.
The global demand for products designed for this exact process has exploded, showing just how important it's become. North America is a huge market, driven by a diverse population with a wide range of curl types and needs. This has led to an incredible variety of products, from cleansers to stylers, often spurred by trends taking off on social media. If you're interested, you can explore more about these market trends to see just how much the curl care world is growing.
By the time you step out of the shower, your hair should be clean, deeply hydrated, and sealed with a good leave-in. You haven't just washed your hair; you've set the stage for a great hair day. Now, you’re finally ready to start styling.
Applying Products for Frizz-Free Curls
Alright, your hair is prepped and dripping wet from the shower, which means we’re at the fun part. This is where the magic happens—where we layer products to build the foundation for defined, bouncy curls that last. This isn't about slapping on some goop and hoping for the best; it's a strategic process.
The number one rule, and I can't say this enough, is to apply your styling products to soaking wet hair. Seriously. Once you start towel-drying, the hair cuticle begins to lift, and that’s a direct invitation for frizz to move in. Styling on wet hair traps that precious water inside the hair shaft, which is the real secret to hydration and definition that doesn't quit.
The Cream and Gel Combination
For most of us with curls, the dream team is a moisture-and-hold combo. That usually means layering a curl cream first, then finishing with a gel. Think of it like this: the cream is your moisturizer, sinking in to nourish your curls and keep them soft.
The gel is your protective layer. It swoops in to seal all that moisture from the cream and water, creating a "cast" around your curls. This cast is what holds your curl pattern together and shields it from humidity as it dries. This one-two punch is how you get curls that are both soft and defined, not stiff or frizzy.
It wasn't always this easy, though. Back in the 2000s, the options for curly-specific products were pretty slim. Thankfully, the market has completely changed, and we now have amazing creams and gels made just for this purpose.
Application Techniques That Make a Difference
How you apply your products is just as important as what you're using. If you just rake everything through, you’ll tear apart all those beautiful curl clumps you just formed. We want to work with them, not against them.
This is where your technique comes in.
Here are the two methods you need to master:
- Praying Hands (Glazing): Start by rubbing the product between your palms. Then, take a section of your hair and gently glide your hands down its length, with the hair sandwiched between your palms like you’re praying. This smoothly coats the outside of your curl clumps without disturbing them.
- Scrunching: After glazing the product on, cup the ends of your hair in your palm and gently scrunch upwards toward the root. Give it a few gentle pulses. This is what encourages your curl pattern to spring up and really helps the hair absorb the product.
The goal here is to enhance the curl clumps that formed while you were conditioning. Aggressive application will just lead to stringy, separated curls and, you guessed it, more frizz. Be gentle. Be deliberate.
Adjusting Product for Your Hair Type
So, how much product should you use? There’s no single right answer. It comes down to your hair's density and texture, and it takes a bit of trial and error to nail it.
- For Fine or Low-Density Hair: Your main goal is to avoid weighing your hair down. Start small—think a dime-sized amount of cream and a quarter-sized amount of gel. You can always add a little more if a section feels dry, but you can’t take it away once it’s in there. We're aiming for definition without sacrificing volume.
- For Thick or High-Density Hair: Your hair can handle more product and probably needs it to get fully saturated. Don't be shy! You might need a quarter-sized amount of cream and a good palmful of gel, applying it in sections to make sure every strand gets coated. This is your best defense against frizz.
This is also where knowing your ingredients can be a game-changer. As you’re picking out products, learning how to read ingredient labels confidently will help you make smarter choices for your hair’s unique needs.
Getting the balance right is what prevents that greasy, weighed-down feeling while still giving you enough hold to fight off humidity. If frizz is still crashing the party, you might want to check out our deep dive on https://hairicc.com/dealing-with-frizz-expert-advice-from-top-hair-salons/ for some extra tips.
With your products applied strategically to soaking wet hair, you've set the stage for a great hair day. Now, you’re ready for the final, crucial step: drying.
Drying Your Hair Without Creating Frizz
You’ve done all the hard work—you’ve prepped your hair and applied your products just right. Now comes the moment of truth. The way you dry your curls can either lock in that beautiful definition or unravel everything into a frizzy mess.
The number one rule? Keep your hands off your hair while it's drying. Friction is the mortal enemy of a well-defined curl. Rubbing your hair with a rough terry cloth towel or constantly touching it will break up your curl clumps and create that dreaded frizz halo. Your best bets are either diffusing or air-drying, and each requires a bit of technique.
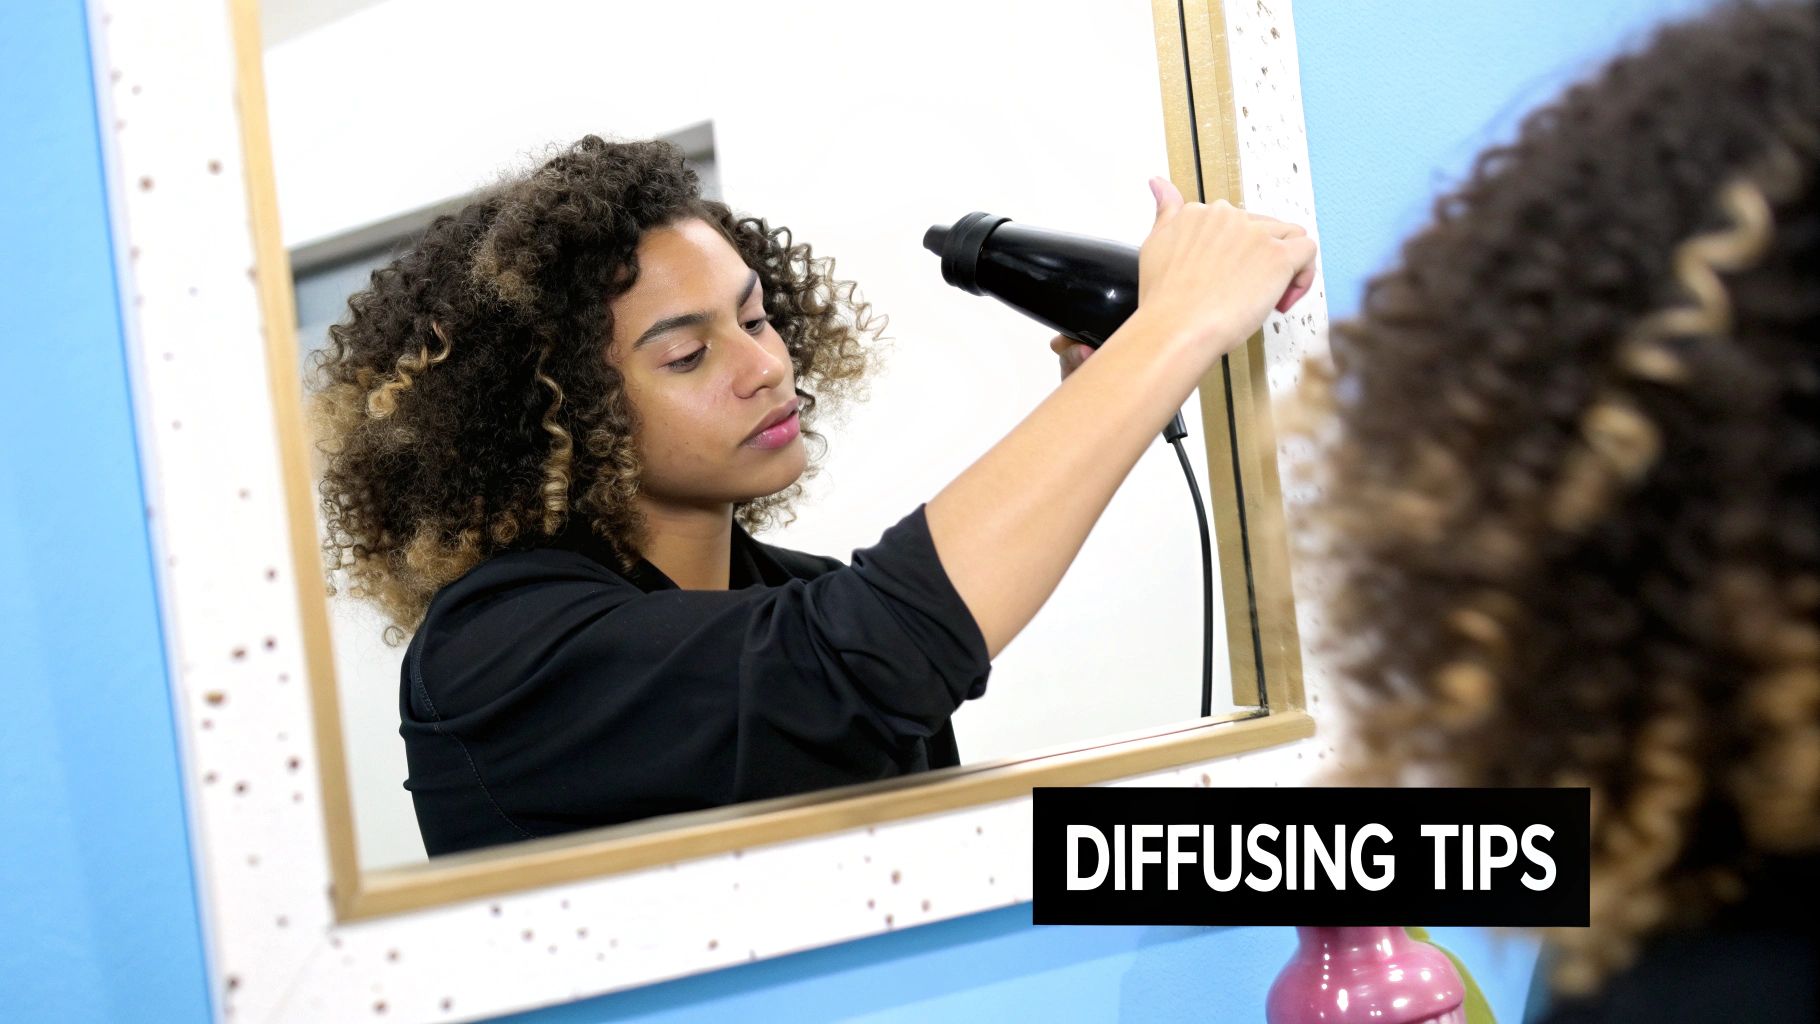
Mastering the Art of Diffusing
If you want dry hair and a serious volume boost, diffusing is your best friend. A diffuser is that bowl-shaped attachment for your blow dryer that spreads out the airflow, so you can gently dry your curls without blasting them into chaos. Honestly, it’s a total game-changer for getting more lift and body.
But just blasting your hair with a diffuser won't cut it. The real secret lies in using low heat and low speed. High heat will suck the moisture right out of your hair, leading to damage and frizz, while a powerful blast of air will just blow your curl pattern apart. You have to be patient.
For incredible volume right at the root, I always recommend a technique called "pixie diffusing." Here’s how it works:
- Flip your head upside down. This is the easiest way to get lift where it counts—at the roots.
- Scoop up a section of curls into the diffuser bowl, bringing it all the way up to your scalp. Hold it steady for about 30 to 60 seconds.
- Now, turn the dryer off. This is the most important part! By switching it off before moving, you prevent the air from blowing your other curls around.
- Move to the next section and repeat. Only turn the dryer back on once the diffuser is in place.
- Keep going until your hair is about 80-90% dry. Leaving it slightly damp lets it finish air-drying, which helps lock in the style without overdoing it.
This on-and-off method might feel a little tedious at first, but trust me, it's the absolute best way to build amazing volume while keeping your curls perfectly defined and intact.
The Gentle Approach of Air-Drying
Don't have a diffuser or just prefer a more hands-off routine? Air-drying is a fantastic, gentle option. The only downside is that letting soaking wet hair just hang can pull out your curl pattern and take forever to dry. The solution is a simple but brilliant trick called "plopping."
Plopping involves wrapping your hair in a cotton t-shirt or a microfiber towel to soak up excess water without creating any frizz. These materials are so much smoother than a regular bath towel. This one step can slash your drying time and encourage your curls to spring up beautifully.
Here’s how to do it:
- Lay an old cotton t-shirt or microfiber towel out on your bed or a chair.
- Flip your hair forward, letting all your curls pile up neatly in the center of the fabric.
- Pull the back of the shirt over your head toward the nape of your neck.
- Grab the sleeves and tie them into a secure knot at the back of your head.
Just leave your hair plopped for 15-30 minutes while the fabric works its magic. After you take it down, you can let your hair air-dry the rest of the way or hit it with the diffuser for a few minutes to set everything in place and get a little extra lift.
Finishing Your Style and Making It Last
https://www.youtube.com/embed/tXJAZ1BQhqk
So your hair is finally dry, but we're not quite at the finish line yet. If you used a gel, you’ve probably noticed your curls are locked inside a hard, crunchy shell. That’s the gel cast, and trust me, it’s your best friend! It’s the protective shield that has been guarding your curl definition and fighting off frizz this whole time.
Now for the best part: releasing those soft, touchable curls from their cast. This is where your style truly comes to life, giving you that perfect blend of volume and definition that will last for days.
Breaking the Cast for Soft Curls
The magic trick here is a technique we call "scrunch out the crunch," or SOTC. It's exactly what it sounds like—a simple motion that breaks the stiff cast without undoing all the hard work you just put in.
But first, a critical rule: wait until your hair is 100% dry. I can't stress this enough. Touching, scrunching, or even looking at your hair the wrong way while it's still damp is a one-way ticket to frizz city.
Once you’re absolutely certain it's dry, you’re good to go.
- Tip your head forward or to the side. This lets you get into the roots and underneath layers easily.
- Gently scrunch upwards with your palms open. Feel that crunchiness break apart? That's what you want. You'll immediately feel the softness underneath.
- Add a little oil for shine. If you’re prone to frizz, rub just a couple of drops of a lightweight oil (think argan or jojoba) between your palms first. This adds a beautiful sheen and tames any potential flyaways.
You'll notice the difference right away. The stiffness just melts away, leaving you with curls that are defined but still have that natural, touchable movement. It's the ultimate goal: the strong hold of a gel with the soft feel of product-free hair.
Creating Lift and Volume at the Roots
Do your curls tend to fall flat at the top? A little focused lift at the roots can completely change your look. This is where a hair pick becomes your secret weapon. It lets you build volume right at the scalp without messing up your carefully crafted curl clumps.
After you’ve scrunched out the cast, flip your hair upside down. Gently slide the pick into your roots and lift an inch or two away from your scalp. The key is to lift and then pull the pick straight out—don't comb it through the ends. That would just create frizz. Concentrate only on the root area for that boost of volume exactly where you need it.
If you're looking to really master these techniques, you can find more professional advice by exploring expert styling tips from the best curly hair salon.
Protecting Your Curls Overnight
A great wash day shouldn't be a one-day affair. The secret to making your style last is protecting it while you sleep. Your standard cotton pillowcase is a major culprit for frizz and flattened curls because of the friction it creates.
Here are the two most effective ways to wake up with great hair:
- The Pineapple: Gather all your hair into a very high, loose ponytail right on top of your head (like the top of a pineapple). Use something gentle, like a fabric scrunchie or an Invisibobble, to avoid leaving a dent. This keeps the bulk of your curls from getting squashed overnight.
- Silk or Satin Protection: Nothing beats the smooth glide of silk or satin. The low-friction surface is a game-changer. You can switch to a silk pillowcase, or wear a satin-lined bonnet or buff. For the ultimate overnight defense, do the pineapple and sleep on a silk pillowcase.
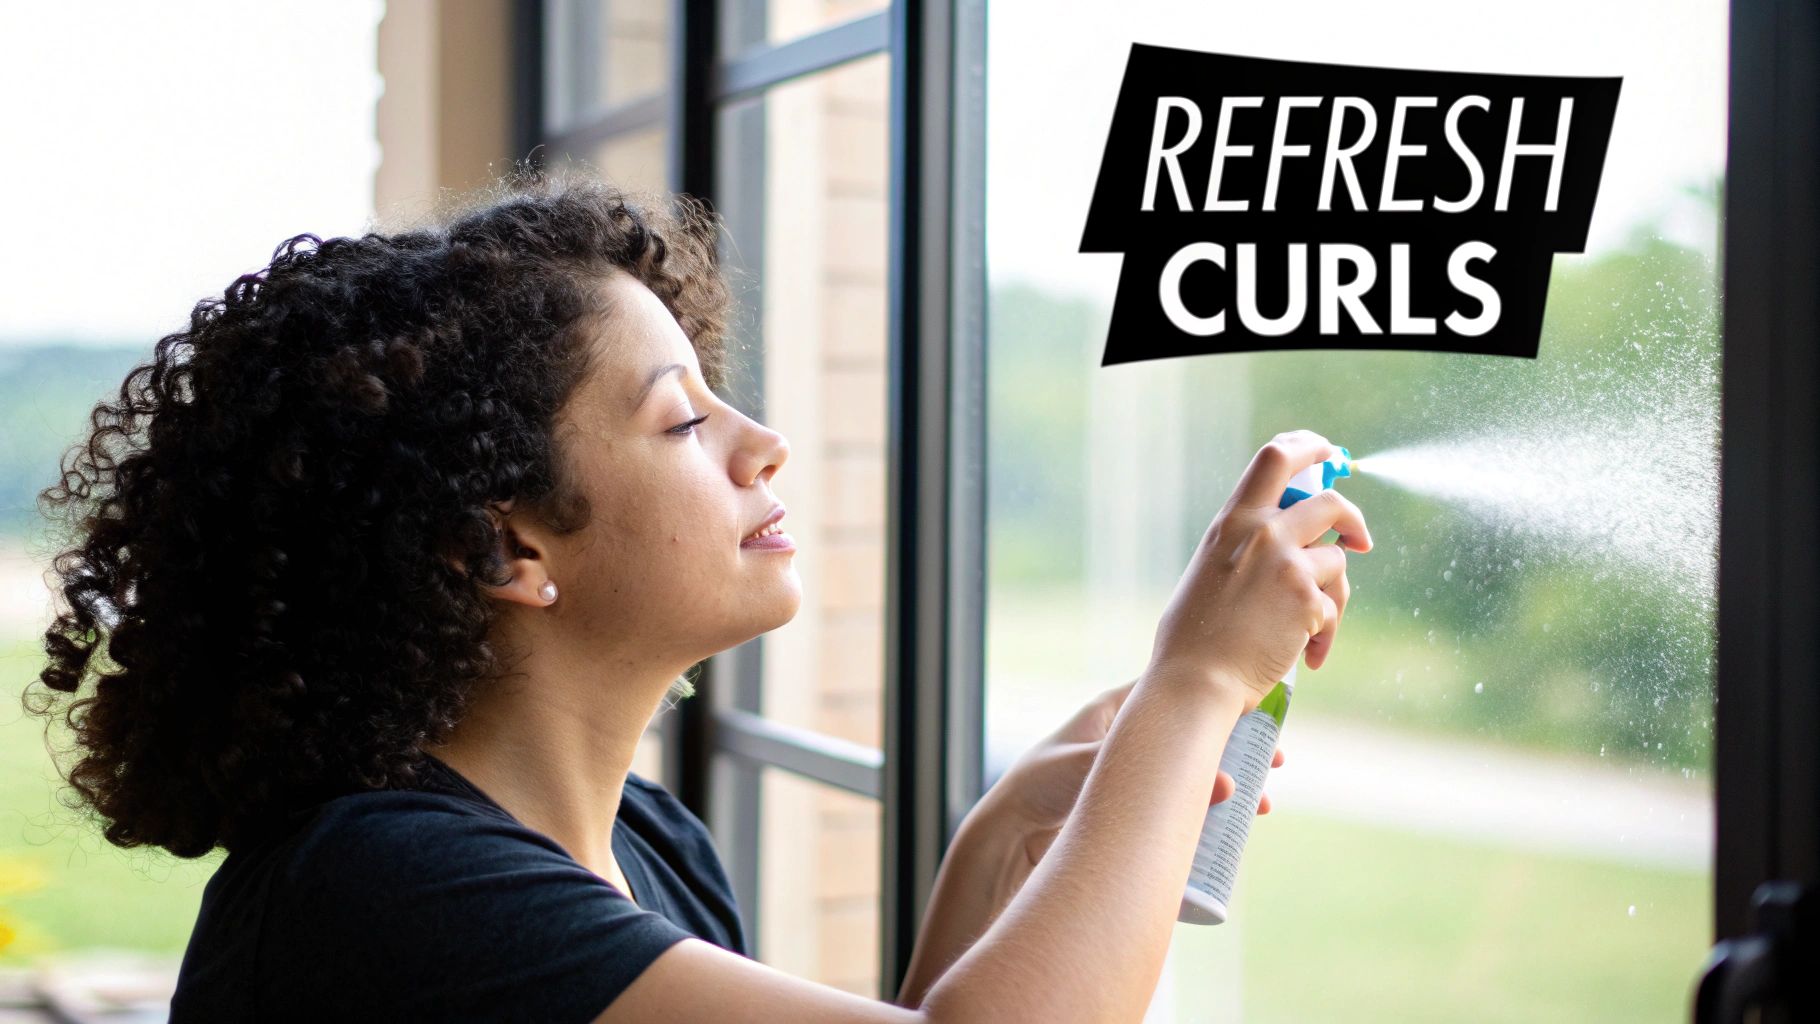
Refreshing Second or Third-Day Curls
It's totally normal to wake up to a few stretched-out or frizzy curls on day two or three. The great news? You don't have to start from scratch. A quick, targeted refresh can bring them back to life in minutes.
Mix up a simple refresh spray in a bottle: mostly water with just a splash of your favorite leave-in conditioner. Lightly mist only the curls that need a little help—don't saturate your whole head.
Once a section is damp, you can finger coil it to reshape the pattern or just give it a gentle scrunch to encourage it to bounce back. Let it air-dry for a few minutes or give it a quick blast with your diffuser. This rehydrates your style just enough, without weighing it down, letting you enjoy those beautiful curls for even longer.
Got Questions? Let's Talk Curly Hair Styling
Even when you think you've finally cracked the code, curly hair has a way of throwing you a curveball. Styling is a personal journey, and what worked last week might not be the answer this week. It happens to all of us.
So, let's dive into some of the most common questions and frustrations I hear all the time. Think of this as your troubleshooting guide to getting those consistently amazing curls you're after.
"Why Is My Hair Still Frizzy After I Style It?"
This is, without a doubt, the number one question. Nine times out of ten, the answer is moisture. Frizz is basically just a curl reaching out into the air, desperate for hydration.
The most common mistake? Not applying your styling products to hair that is soaking wet. I don't mean damp—I mean dripping. This is how you lock that essential water into the hair cuticle before frizz has a chance to form.
Another culprit is simply not using enough product, especially gel. If you’re still seeing a halo of frizz, you probably need a bit more gel to create that strong, protective cast around your curl clumps. And I know it's hard, but you have to keep your hands off while it’s drying. Touching it is a one-way ticket to frizz city.
"How Do I Figure Out Which Products to Use?"
This one feels overwhelming, but it really boils down to two things: your hair's texture (is it fine or coarse?) and its porosity. Porosity is just a fancy word for your hair's ability to soak up and hold onto moisture, and honestly, it changes everything.
- Low Porosity Hair: This hair has a very tight, sealed cuticle, so it's tough for moisture to get in. Because of this, it's easily weighed down by heavy products. You'll want to reach for lightweight lotions and mousses that won't just sit on top of your hair.
- High Porosity Hair: This type of hair has a more open cuticle, so it drinks up moisture like a sponge… but it also loses it just as quickly. The key here is sealing that hydration in with richer creams, butters, and even oils.
A good rule of thumb is to stick with lighter formulas if you have fine hair, no matter the porosity. If your hair is coarse, it can usually handle thicker, more buttery products. My best advice? Try one product line at a time to see how your hair reacts before you go all-in on a new arsenal.
What's a "Gel Cast"?
You know that stiff, sometimes crunchy feeling your hair has after you've applied gel and let it dry? That's the gel cast. Don't fear the crunch! It's actually a great sign. The cast forms a protective shell that locks in your curl pattern and fights off frizz while your hair dries. Once your hair is 100% dry, you just gently scrunch it out, and you're left with soft, super-defined curls that actually last.
"How Can I Get More Volume at My Roots?"
Ah, the quest for lift. Flat roots can happen to anyone, especially if your curls are long or heavy.
The easiest trick in the book is to style with your head flipped upside down. When you apply your products and diffuse this way, you're encouraging the roots to dry pointing up and away from your scalp, not plastered down to it.
Another brilliant technique is using root clips. After your hair is about 50% dry, take some small metal clips and place them right at the scalp, lifting the roots up. Let your hair air-dry or diffuse the rest of the way. When you take them out, you get instant, targeted volume.
Finally, for that last little boost, grab a hair pick once your hair is totally dry and you've scrunched out any cast. Gently slide the pick into the root area and lift, but be careful not to comb through and break up your beautiful curls. It’s the perfect finishing touch.
At Hairicc, we believe understanding your curls is the first step toward truly loving them. Our stylists are experts in all things curl care and are ready to help you build a routine that works for your unique hair. Book your consultation today and let's unlock the full potential of your incredible curls.